

Winter can be hard on boats, even when they’re properly winterized, covered, and tucked in for the long dark nights. Come spring, we’re all antsy to get back on the water, but before you untie the lines, it’s important to make sure your boat is as ready as you are.
Spring commissioning—whether you do it yourself or hire your boatyard—should cover the usual tasks such as bottom painting, hull waxing, installing sails, etc. But there are other areas that often get overlooked in our excitement to get out sailing, things that may seem obvious but that boatowners often don’t think to check and that boatyards may not include on their standard spring commissioning list.
Why do I know this? Because I’m married to an ABYC-certified master technician who’s been running boatyards for his entire career. Most of his customers are sailors, and every season, he sees at least a few race away from the dock as soon as they hit the water, only to come limping back with an issue that could easily have been sorted had they slowed down a little during their spring prep. Here are some of his suggestions to make your spring commissioning as thorough as possible before you cast off the lines for the first time this season.
Safety and Navigation
Check your lights before you head out for your first overnight. Winter’s dampness can cause moisture and corrosion in wiring; vibration and movement from the boat being moved by a lift or even sitting in jackstands all winter can loosen bulbs. In extreme cases, mast wiring that’s not protected inside a conduit in the mast can even break.
It’s a simple check: Turn on the anchor, running, and steaming lights. If they work, you’re good to go. If not, diagnose and repair. Nine out of 10 times it’s a dead bulb or a bad or corroded connection between the bulb and the fixture. If you’re comfortable using a voltmeter and working around DC wiring, have at it. If not, ask your boatyard to assess it. Usually, it’s a quick fix.
Whether the boat wintered in or out of the water, double check that your bilge pumps are working before you head out. One way to do this is to add water to the bilge and pump it out—confirming first that your bilge is clean and you’re not dumping oily water overboard. A better way is to pull the pickup hose out of the bilge, check the strainer to make sure it’s clear, put it into a 5-gallon bucket filled with clean water, then pump it out. This method, while potentially messy, lets you check the strainer, which often gets gunked up. If it doesn’t pump out, find out why. Is there a hole in the hose (either intake or discharge) or in the diaphragm? Are the check valves frozen?
If your boat has an electric bilge pump, it likely can be turned on either manually or automatically via a mechanism that senses water level. First, turn the pump on manually and make sure it’s pumping water overboard. To test the pump’s automatic feature—whether it’s activated via a float or electronic switch—make the switch believe the bilge is filling with water. For a float switch, lift the float. For an electronic switch, add enough water to the bilge to ensure the switch should activate (again—make sure your bilge is clean). If the pump doesn’t turn on automatically, corroded connectors from the switch to the pump are frequently the culprit, as often these reside in the bilge’s harsh environment. In all cases, make sure the pump is discharging overboard.
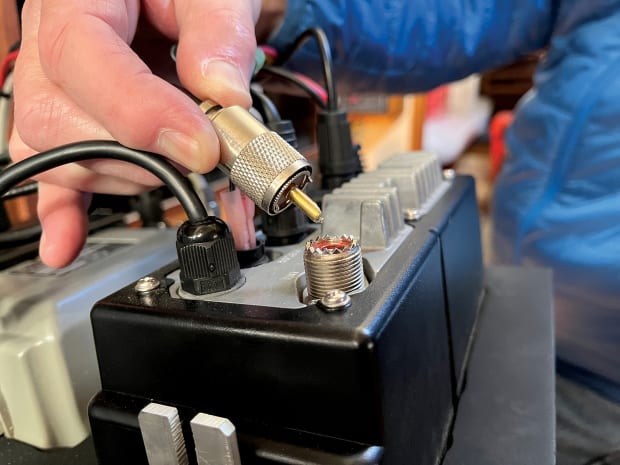
Check your VHF radio. Turn it on and perform a radio check on Channel 9 (not 16). You should get proper response from various vessels near and a little far. If you don’t, find out why. Is the antenna wand still attached to the antenna base? Set screws can vibrate loose, and the wand can fall out. If possible, check the co-ax connectors at the base of the mast. They should be clean, bright, and shiny. Check the co-ax connector at the back of the radio too; it should look the same. If all of those look good, it could be the connector at the antenna, which will require a trip up the mast. If you have any hesitation about going up the rig and checking it, hire a pro to suss this one out.
Engine
Too often, boatowners hop onboard in spring and fire up the engine without doing some basic checks. If you don’t have a DIY relationship with your engine, you can ask your yard to do these, but it might be worth your while to get to know your power plant a little better anyway, and this routine will help you accomplish that.
First, using a bright flashlight, examine the engine. You’re looking for anything out of the ordinary, such as an oil streak down the side of the block, or a trail of green residue left by a water leak on the faceplate of the raw water pump. Is the front of the engine covered in black dust from the alternator belt? Check under the engine to make sure nothing has leaked out of it (engine oil, antifreeze, gear oil).
Look at all four of your engine mounts. Are all of the adjustment nuts and locknuts tight? If an adjustment nut has loosened and walked down the stud, it’s possible the engine is out of alignment and should be realigned. Are the engine brackets—which support the engine on the mounts—intact? If one is broken, you’ll need to hire a mechanic to repair it.
Check all of the fluids—oil, coolant, and gear oil. If the engine was properly winterized, the engine oil should have been changed, which means that the oil filter is likely empty. To reach the proper oil level, make sure oil is present on the dipstick, then start the engine and let it run for a few minutes. Shut it down, wait 10 minutes, check the oil level, and top up as needed. Don’t overfill.
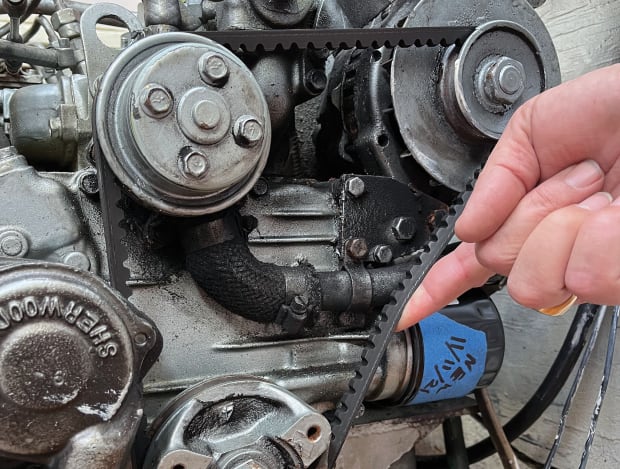
Check your alternator belt tension. If it’s a V-belt, there should be no more than half an inch of deflection on the long side. If you’re not sure how to check this, have your yard mechanic do it. Black belt dust on the front of the engine is a good indicator that the belt is too loose.

If it’s a serpentine belt, start the engine and make sure that it’s running true on the pulleys. If it looks misaligned, correct that alignment as soon as possible.
If your boat was properly commissioned in spring, the fuel filters should have been changed. While still tied to the dock, start and run your engine for 20 minutes to ensure there’s no air in the fuel system.
Water System
As part of winterization, boatyards and boatowners will often disconnect a boat’s hot water heater and drain it, rather than fill it with a large quantity of antifreeze. Sometimes, reconnecting the hot water heater to the pressure water system is overlooked. In springtime, make sure those connections have been reinstalled on the hot water heater. If you’re not sure how to do this, ask your boatyard to do it. Don’t activate the electric side of your hot water heater until you’re sure it’s full of water; the electrical heating element will burn out immediately if it’s activated when the tank is empty.
After the freshwater system has been de-winterized, it’s a good idea to make a final check of your pressure water system. To do this, close all of the spigots and turn on your water pump. You should hear it running, then slowing as the pressure increases, and then stopping when the system is pressurized. Wait and listen. If the pump activates again within two to three minutes and runs for a short time, wait some more. If it activates again in two to three minutes, you have a water leak somewhere, and you’ll need to track it down.
Find the leak and repair it. Then retest. The pump should come to pressure and then be quiet. (Note: Depending on the age and complexity of the freshwater pressure system, it’s not unusual for a water pump to top up the pressure every 10 or 15 minutes with a short burst.)
On Deck
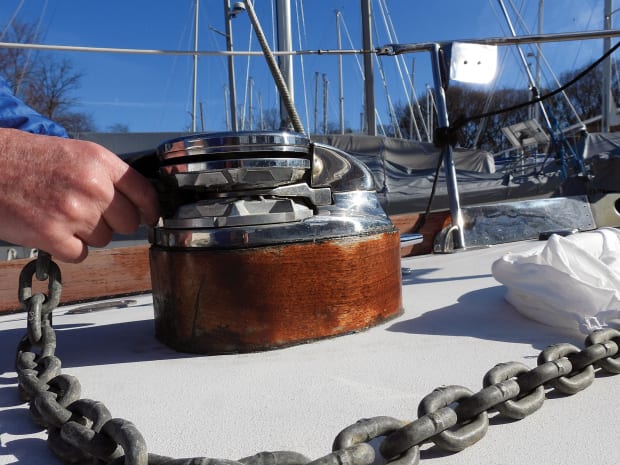
Many sailors count on their electric windlass to raise their anchor, but winter condensation can corrode an electric windlass’ components. Check it before you leave the marina for your first overnight. First, make sure your anchor can’t fall—secure it to the boat. Carefully remove the chain from the gypsy and make sure it’s well clear. Activate the windlass. If it doesn’t run, consider hiring a pro to diagnose and troubleshoot this problem. Due to the high amperage loads and the complexity of the switches, solenoids, and actuators, only the most qualified DIYer should undertake these repairs. Safety note: If the windlass works fine, turn it off—and make sure it’s off—before reinstalling the chain.
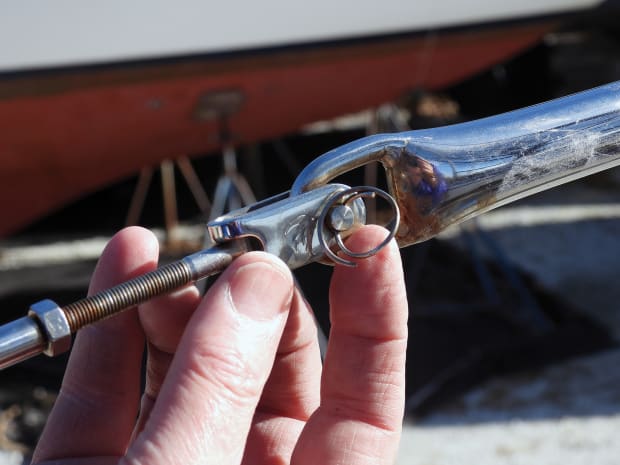
Check your lifelines to see that they’re properly adjusted and haven’t loosened up over the previous season of people grabbing them. If your lifelines have closed-body turnbuckles, make sure the locknuts have not vibrated loose over the winter. If they have gates, check the locknuts on the pelican hooks to be sure they’re in place. Finally, check the ends where they connect to the bow and stern pulpits. Make sure that the clevis pins are properly secured with cotter pins or “ring-dings.”
Give your winches a quick spin before heading out. If it’s been a hard winter, severe cold can solidify the grease in the winch, making them very difficult to turn. If they’re dragging, take them apart, clean, and regrease them.
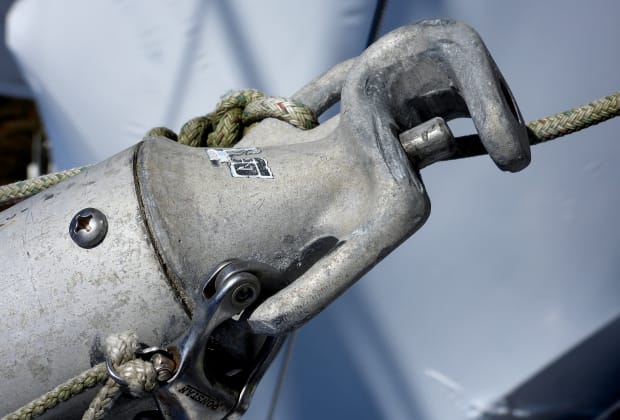
If you have a spinnaker or whisker pole that lives on deck or on the mast, check that the end fittings are operating smoothly, particularly those with trigger mechanisms. These can easily freeze up during the winter through lack of use. A penetrating spray lubricant like WD-40 or PB B’laster should clear them. If not, it may be necessary to remove the end fittings to fix them. This requires some specialized tools that a professional rigger will have, so you may want to hire a pro to do it.
Photos by Wendy Mitman Clarke
April 2023


